SAIT Assingment -Blog2
Website construction phase
The purpose of this blog is to put the actual website on the server and run it. Let’s use the functionality in AWS to drive the actual website.
-
Create vpc What is VPC? It is not a real private network, but a virtual private network. It is vpn that makes it work as if it is actually on the same network but on another network.
-
Subnetting What is Subnetting? Subnetting is the process of creating a subnetwork (also known as a subnet) within a network. Network interfaces and devices within a subnet can communicate with each other directly. Routers facilitate communication between different subnets.
-
Create an Internet gateway what is gateway
An Internet Gateway is a redundant, horizontally scaled, and is a highly available VPC component. It allows communication between instances in your VPC and the internet using VPC route tables for internet-routable traffic.
Sequence
First of all . log in with your account in AWS
-
Create a VPC after logging in
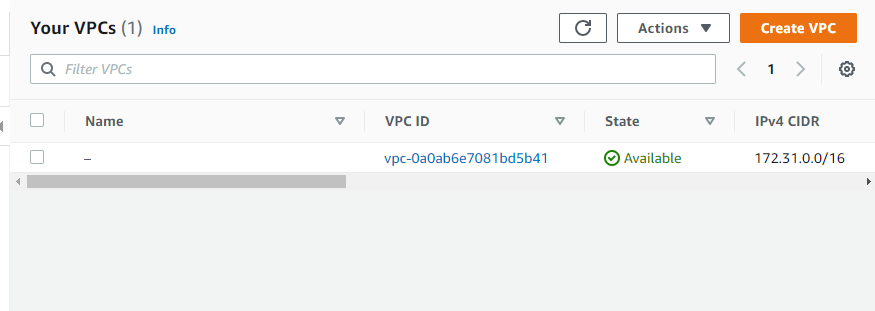
Create a vpc by clicking vpc in the service menu
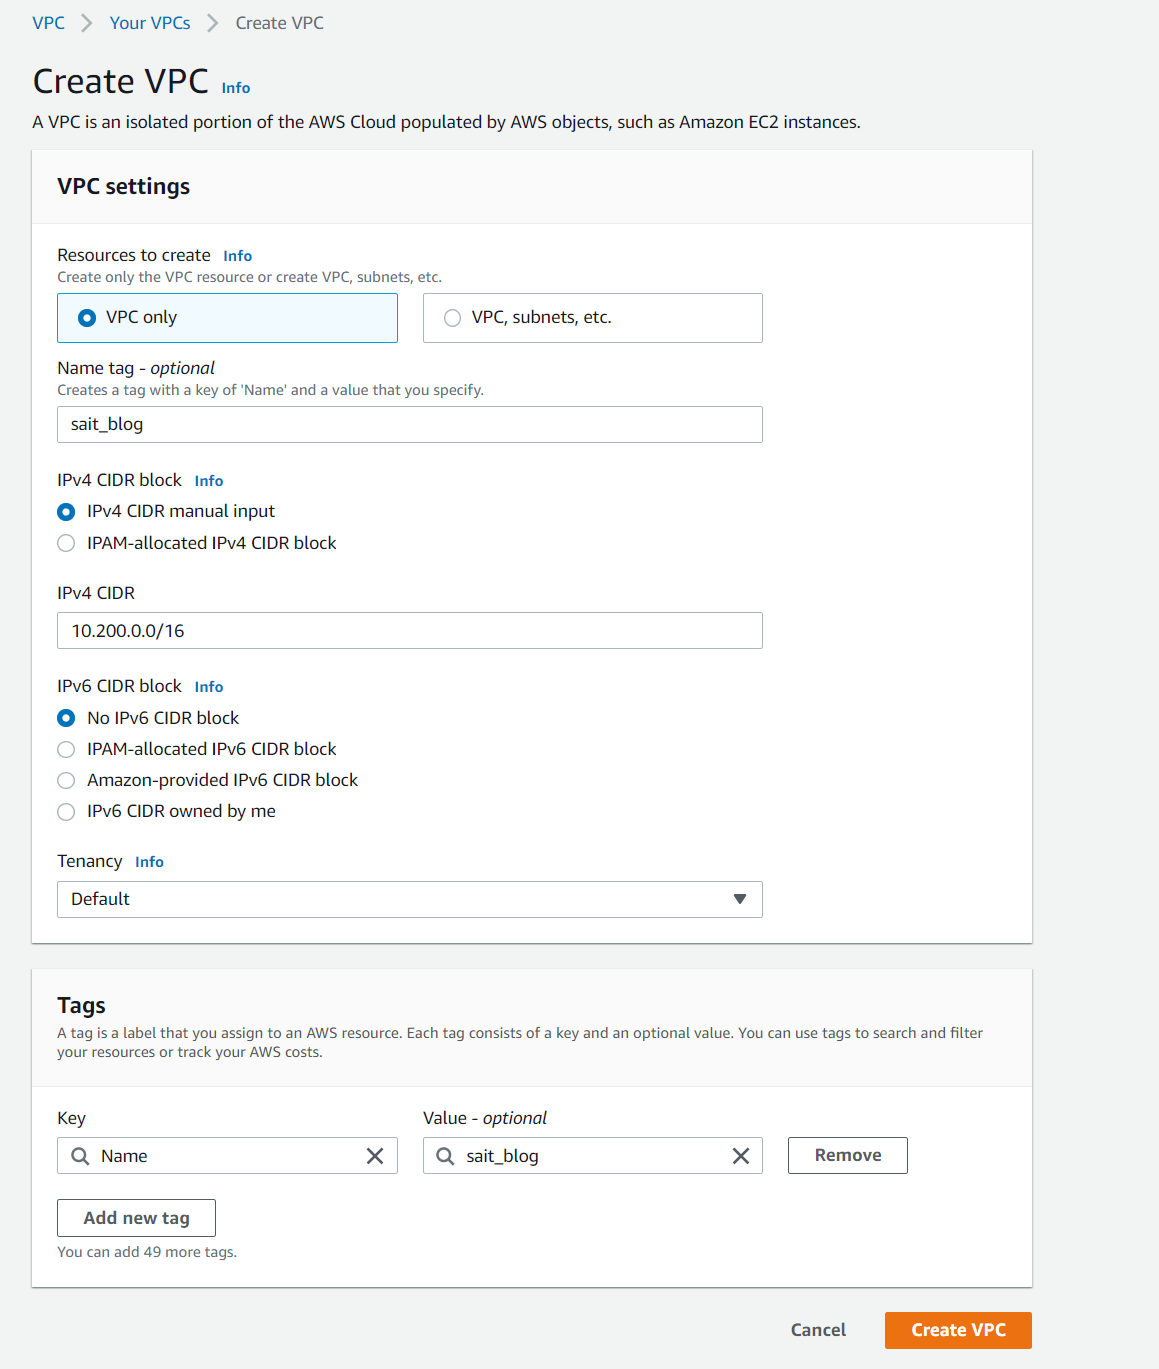
Set the vpc name in the Name tag section. I did it with sait_blog. Any name is possible. In case of using various vpc, it is also possible with a domain name ex) sait_blog.com.
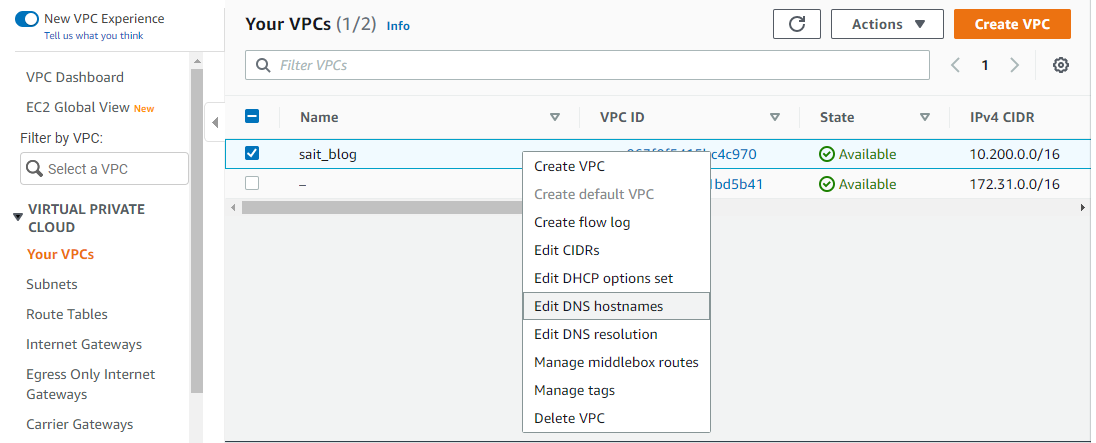
Right-click on vpc and click Edit DNS hostnames. Then a new window will open, set DNS hostname to ENable. This is to automatically name the server created on the network I created. -
Subnetting
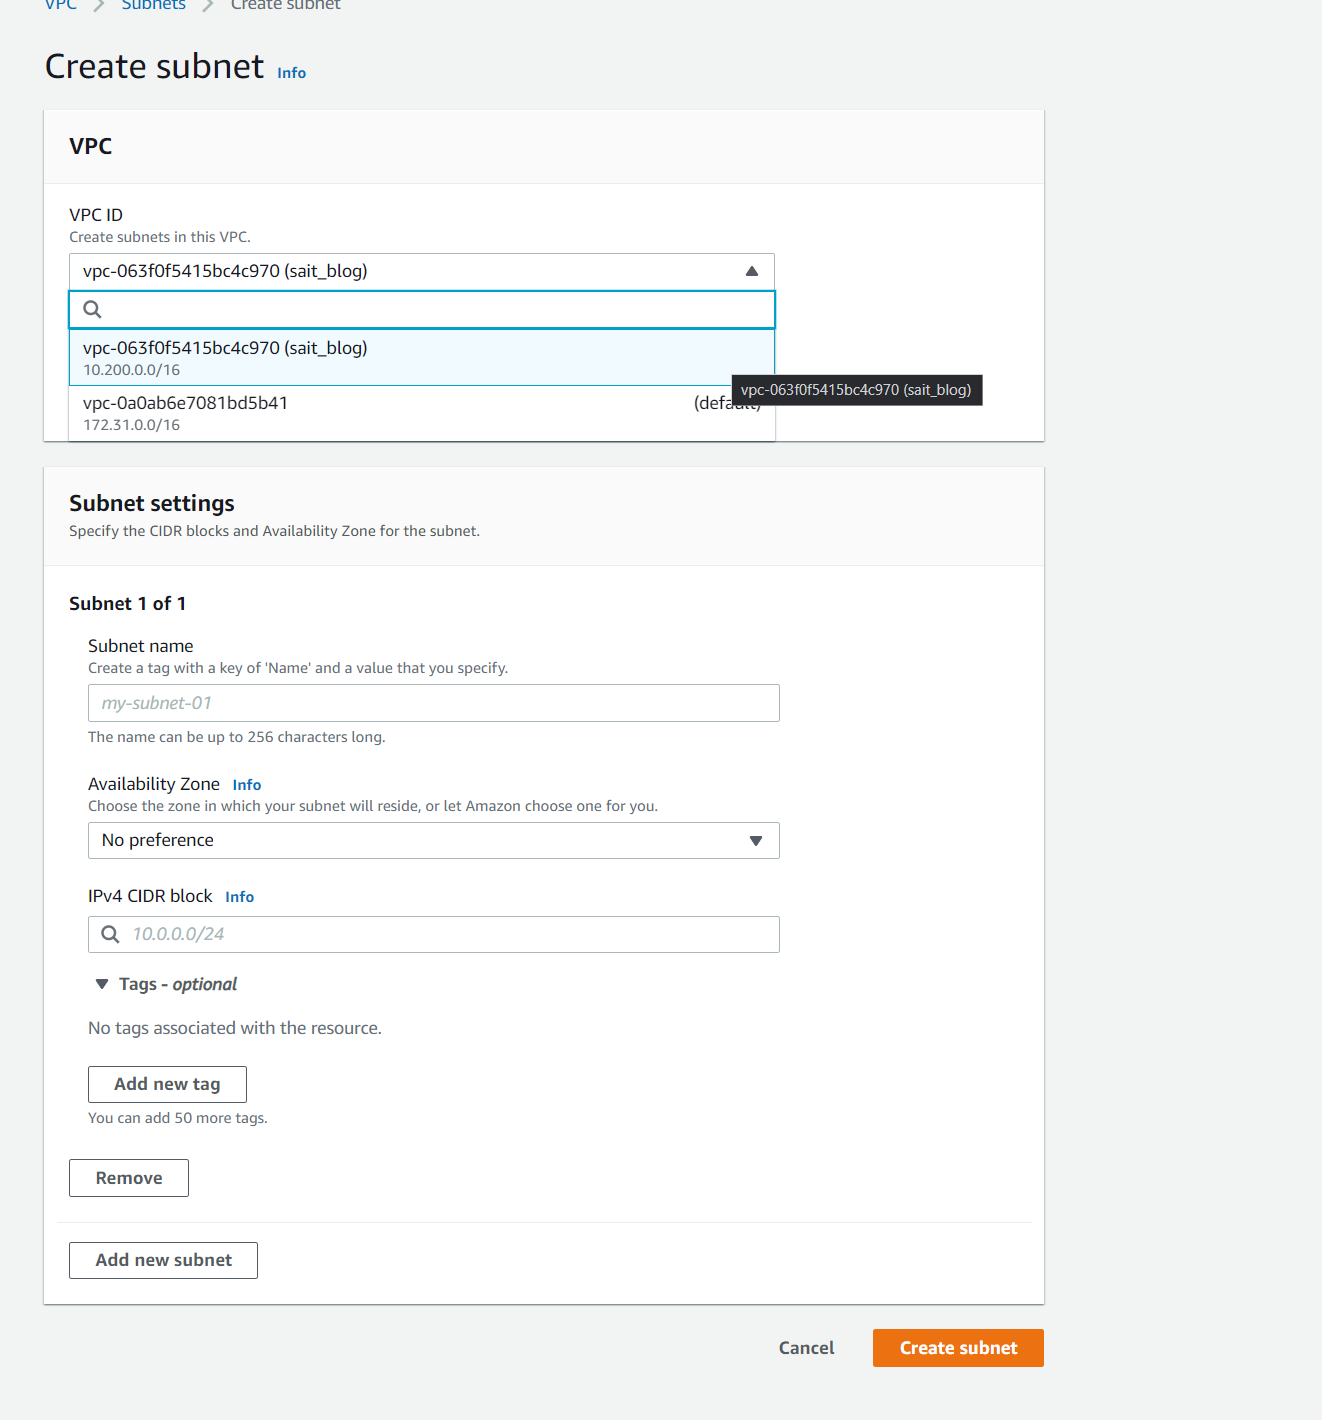
Click Subnets in the line below your VPCS and then click “CREATE subnet”, the screen above appears. If you open the vpc ID select bar here, you can check the name of the VPC you created. Click the name of the vpc to open the subnet setting section. A total of 4 subnets were created, 2 web subnets and 2 db subnets were created. For security reasons, I created two different subnets each.

When you create a subnet, the following table is displayed. Let’s check if the subnet address is the same as the subnet address you created. -
Create an Internet gateway
I create an internet gateway and match it with the IPv4 address (10.200.0.0/16) created in VPC .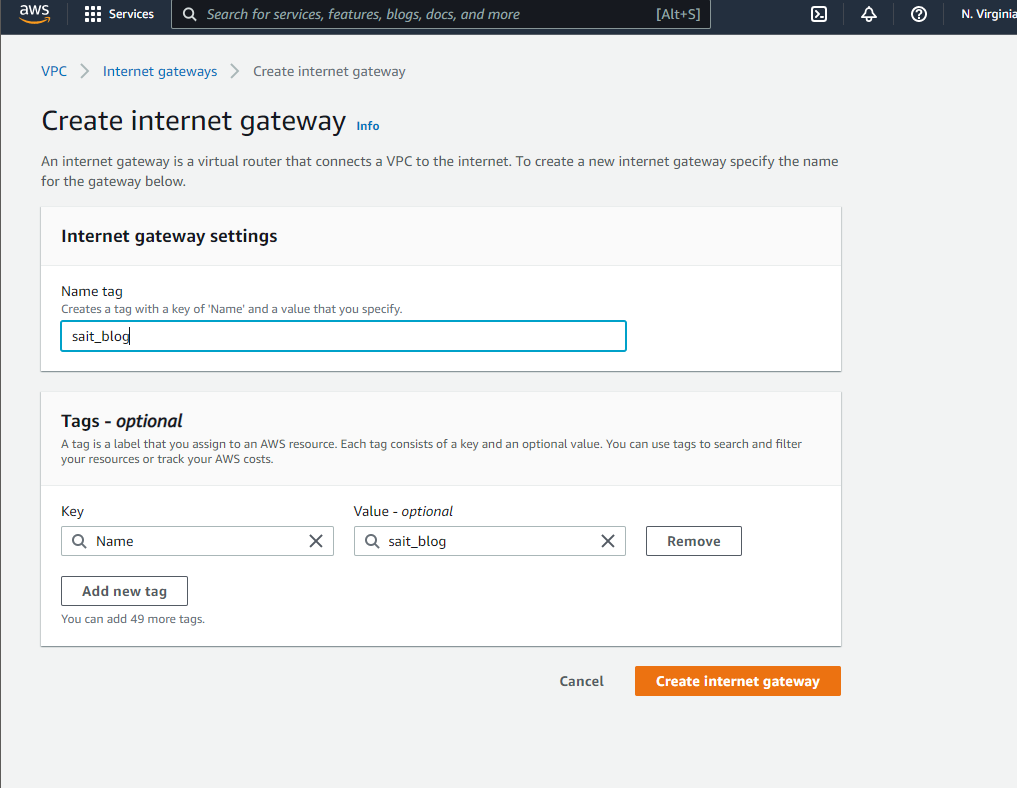
click the create internet gateway and add name in my case I wrote name as sait_blog and click the create internet gateway button.
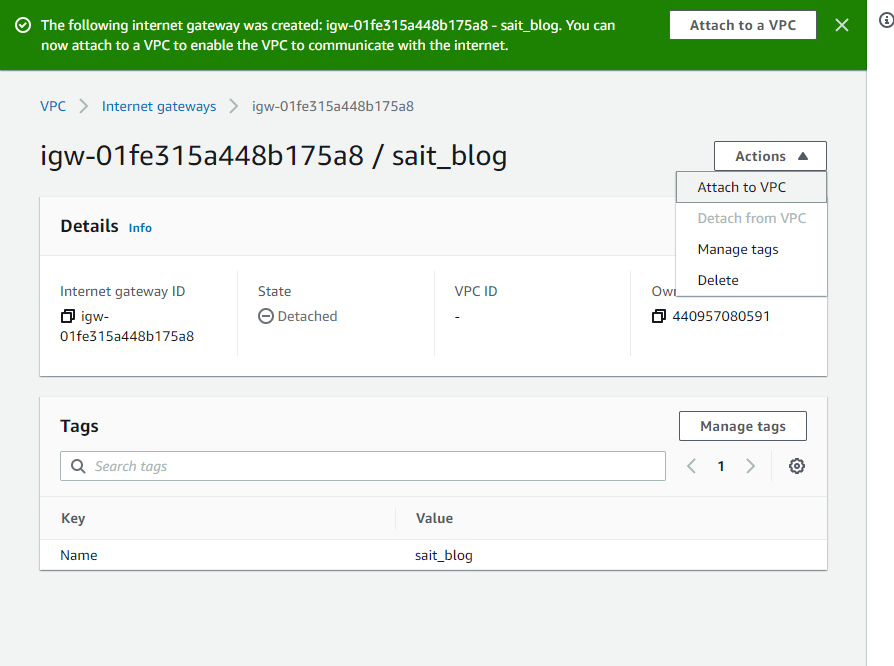
now click the actions and select attac to VPC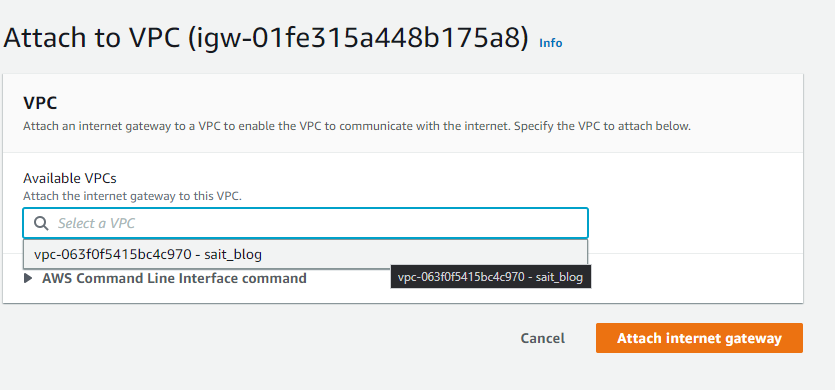
this is for matching gateway to VPC select vpc
-
Create Route table

A table is created in the vpc I created
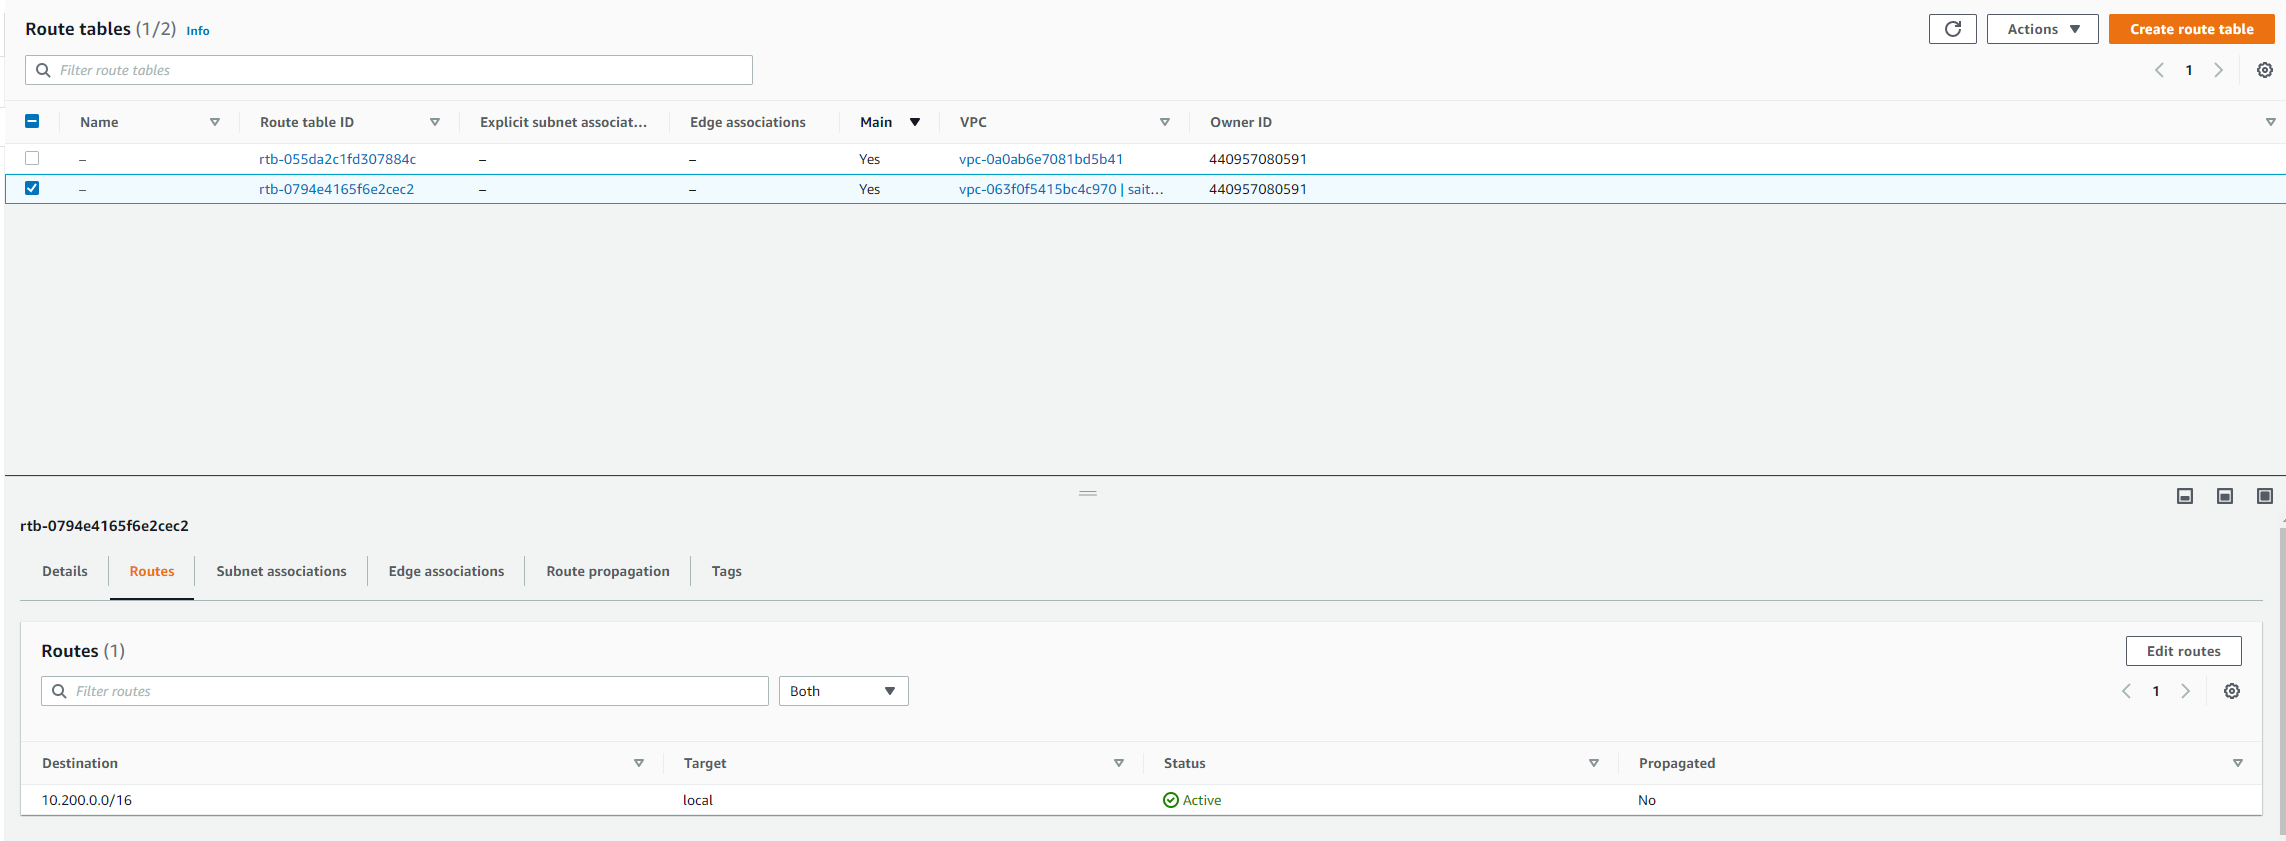
If you click the vpc router table you just created, you can see the router information at the bottom.

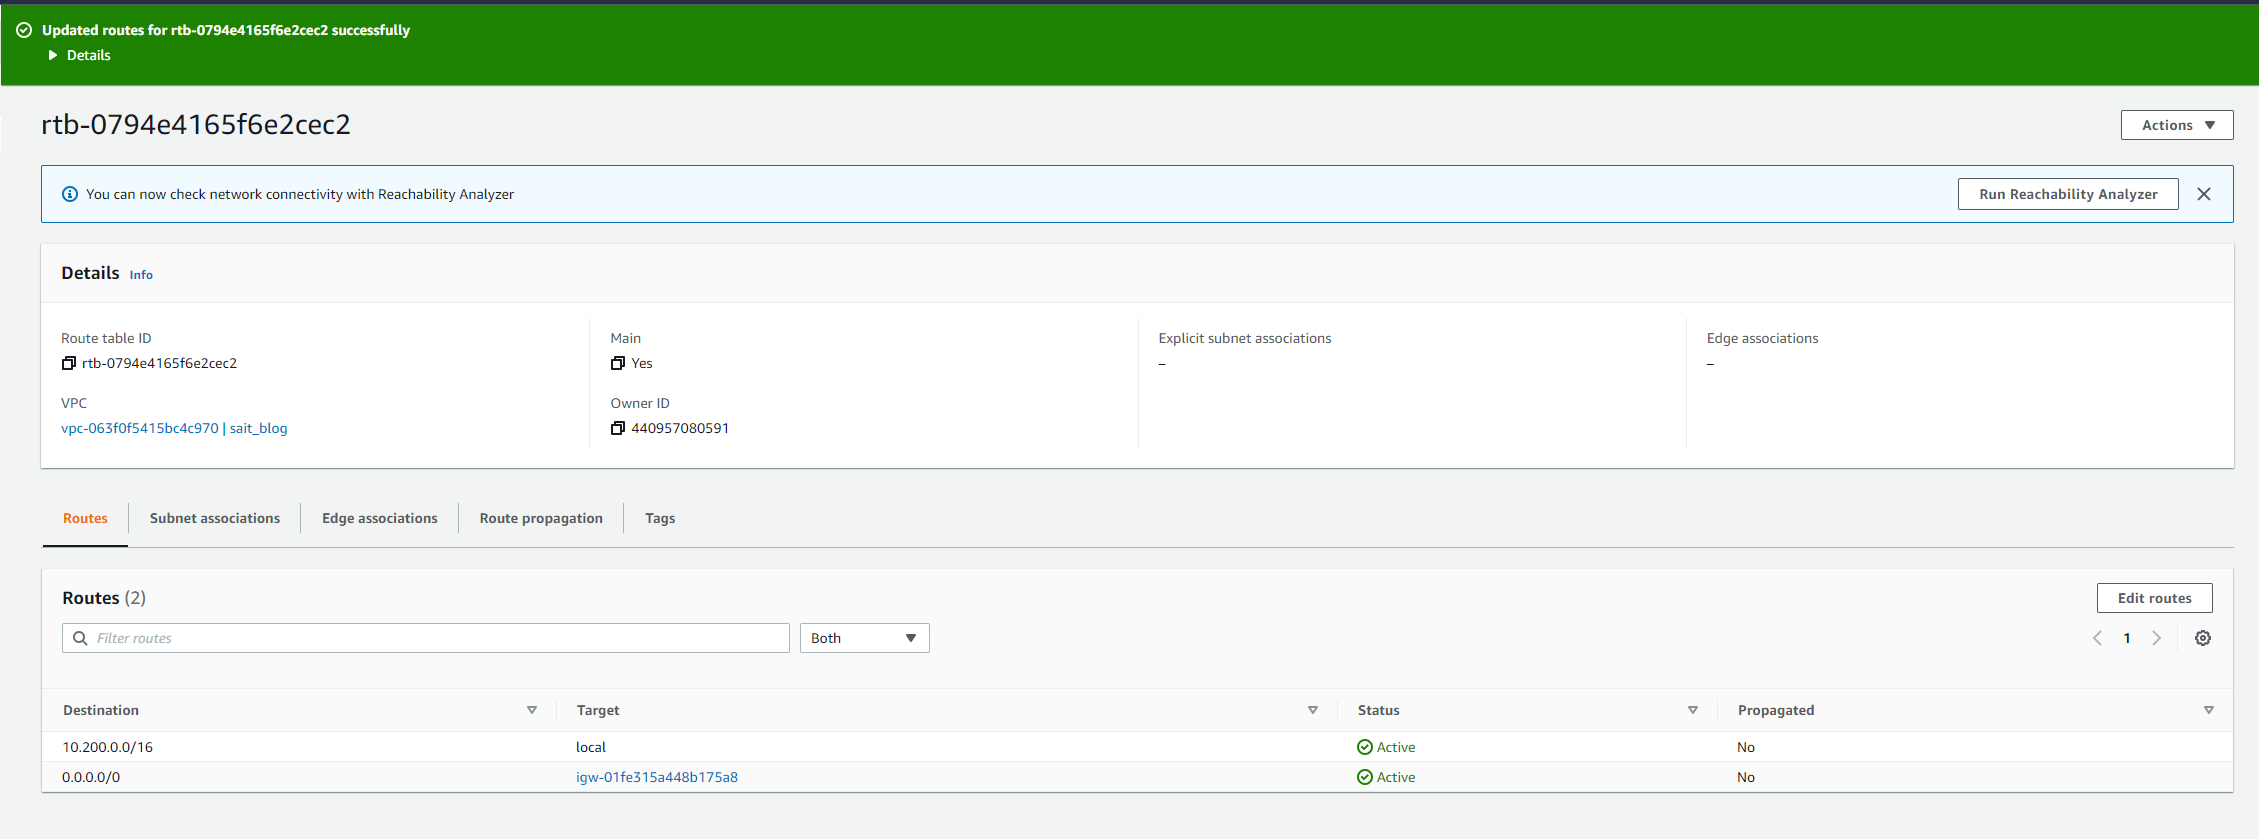
Check that status is active
-
Create EC2 server
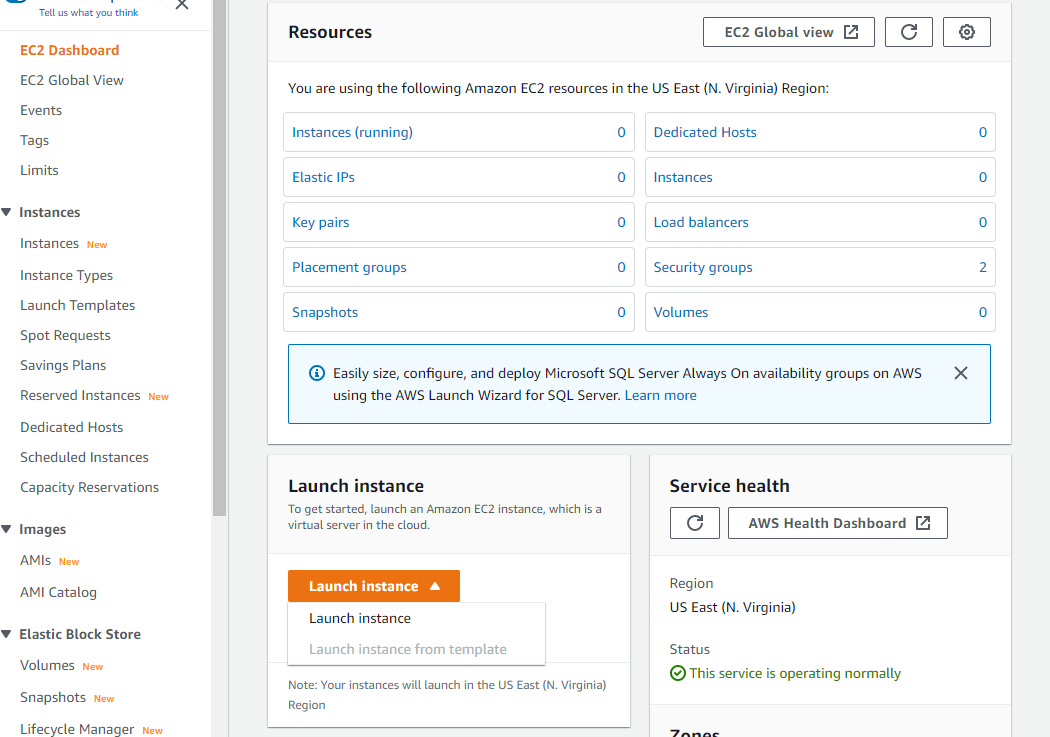
I create a server by clicking EC2 in the AWS service menu.
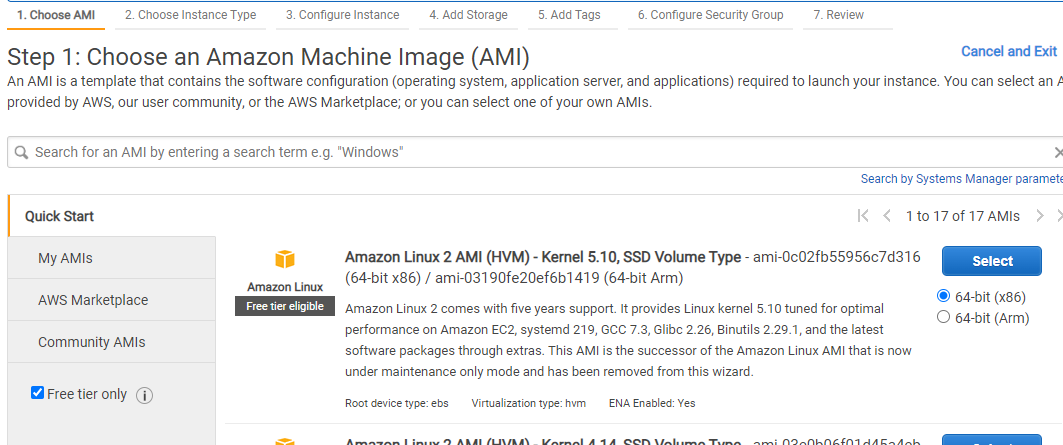
I used Amazon Linux. Use the desired Amazon Machine Image and press select
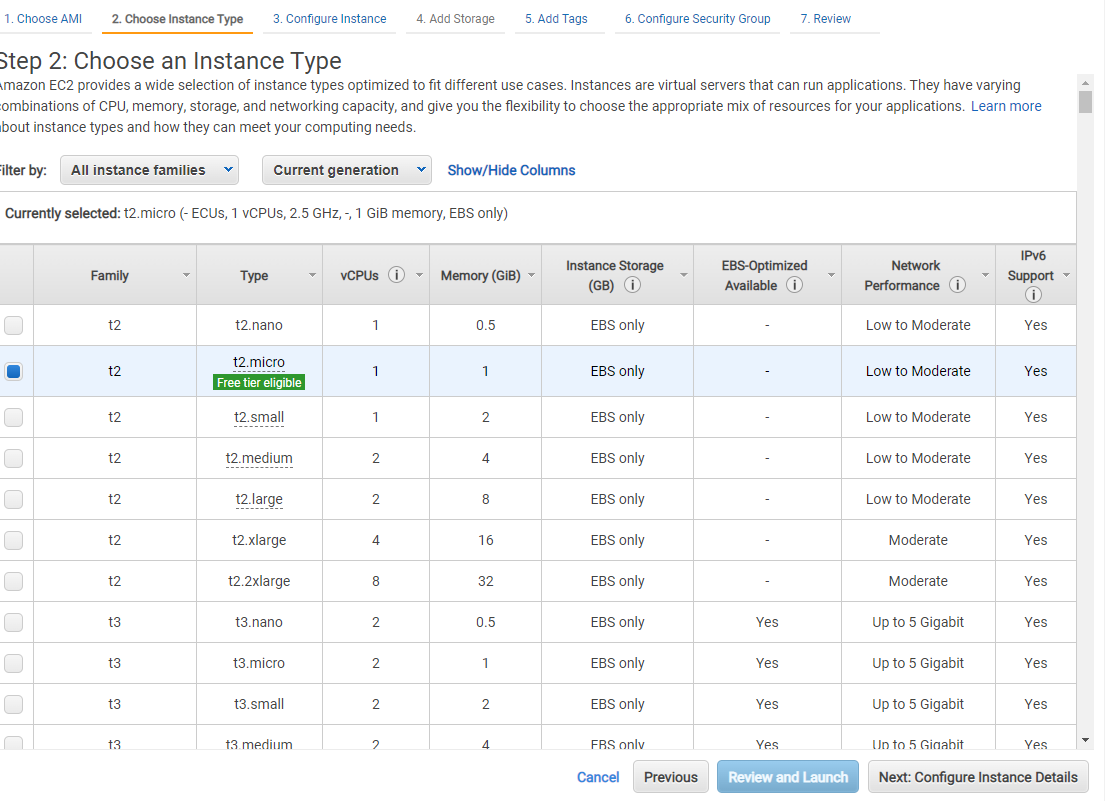
Then, set the instance type you want. I used the free version.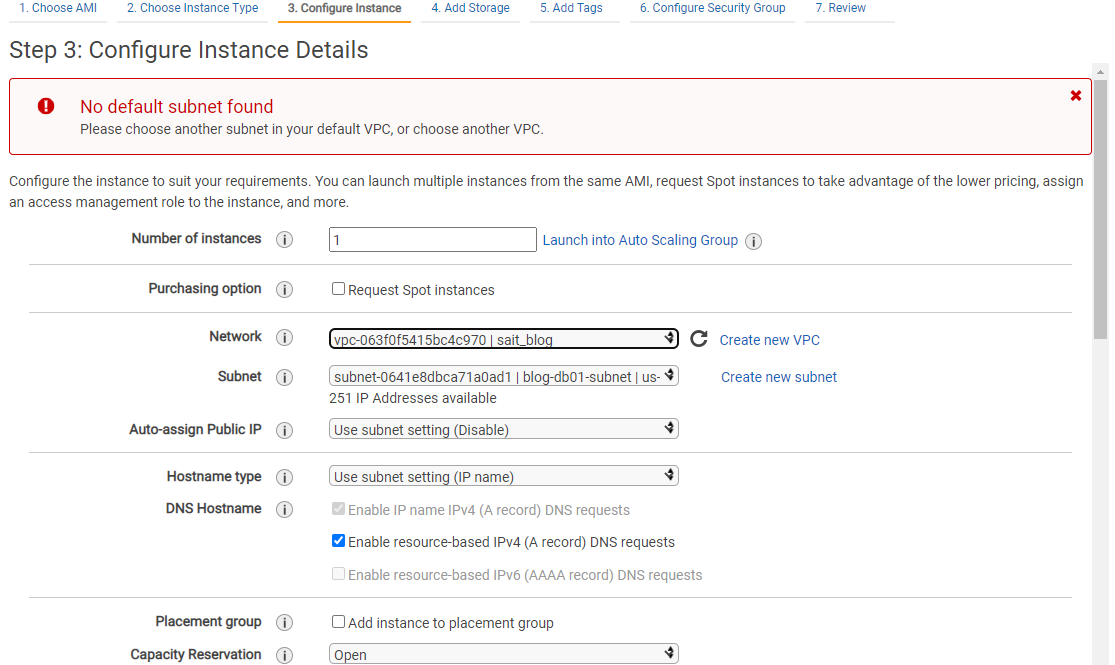
Subnets are automatically added when you select the VPC you selected for the network.
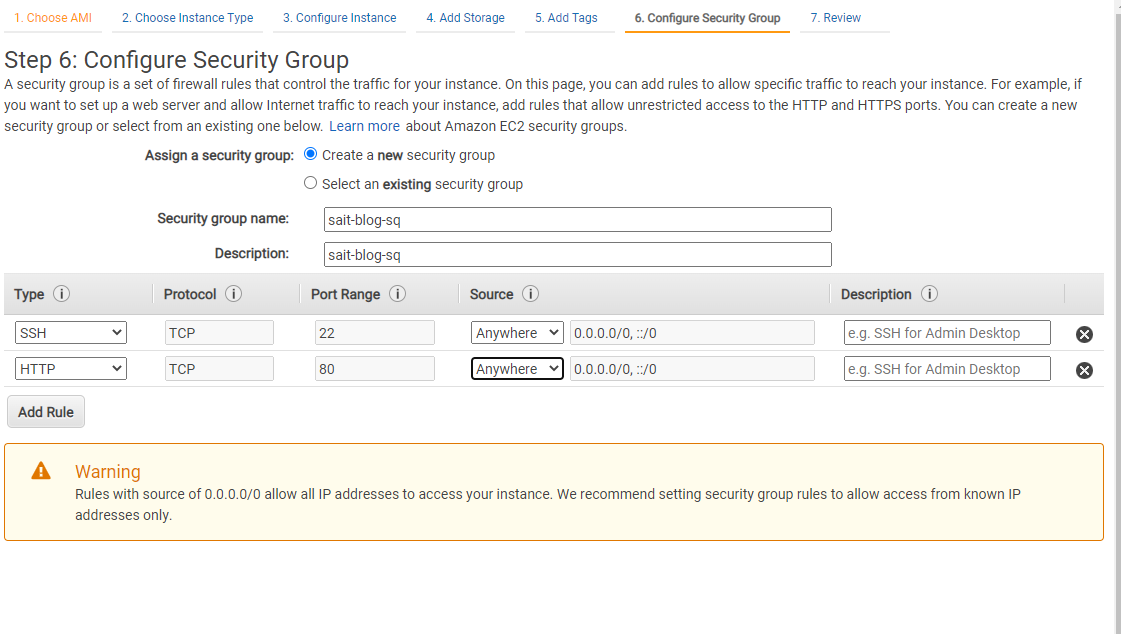
When creating the security group, I allowed only SSH and HTTP to the security group first. I will connect to the newly created server from the outside through SSH, and I will use apache as the web server, so I made a security group that allows HTTP(80). You can set this part according to your situation.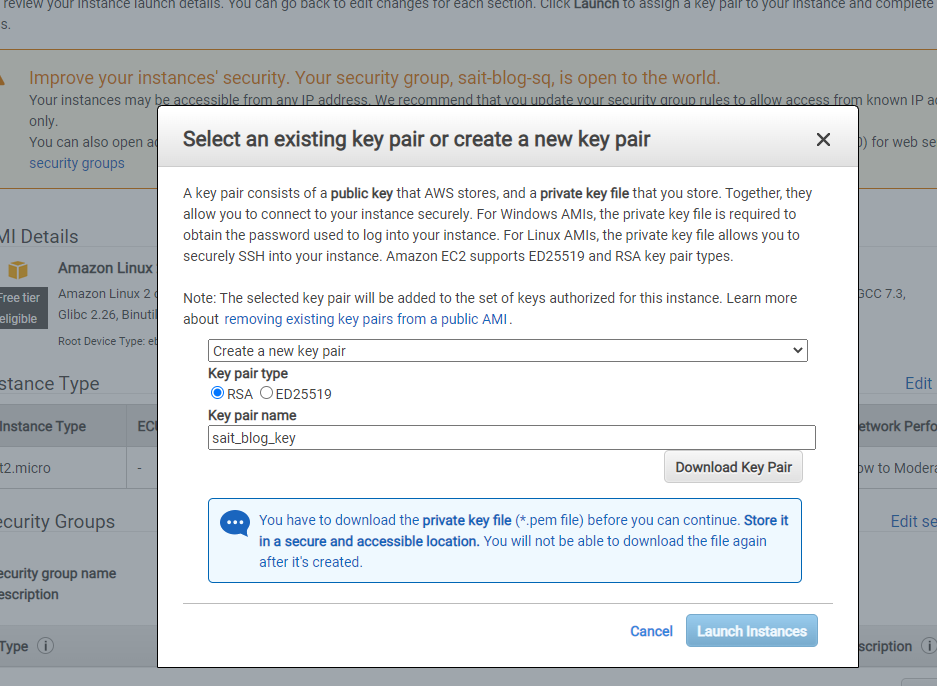
Finally, you can download the key used to connect to the server in the review (STEP 7). You must have the corresponding key to access the server , so make sure to keep it after downloading . It is impossible to create a server without downloading, so you must download it and never delete it.
https://docs.aws.amazon.com/AWSEC2/latest/UserGuide/putty.html
There are two ways to access the server. There is a way to access from a Linux server and a way to access from a Windows server with putty. Please refer to the user guide on the Amazon site for this access method
-
DNS matching Elastic Ips After checking the connection through putty, assign a fixed authorized ips to the dns and match the server
Elastic IPs
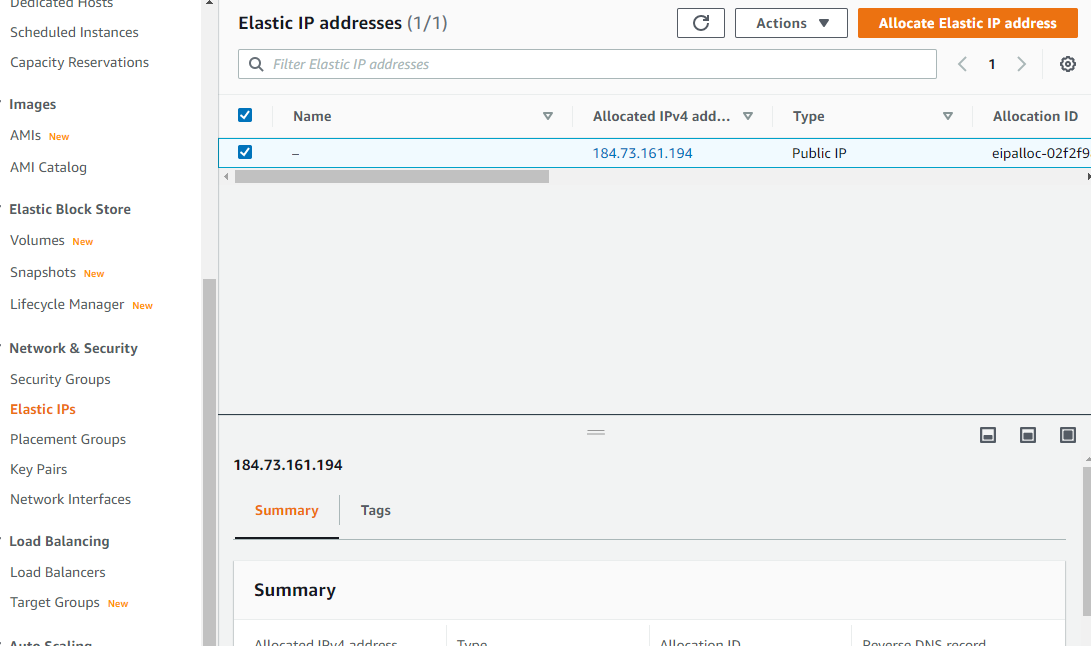
In the navigation with the Network & Security section, select elastic ip and click allocate Elastic ip address
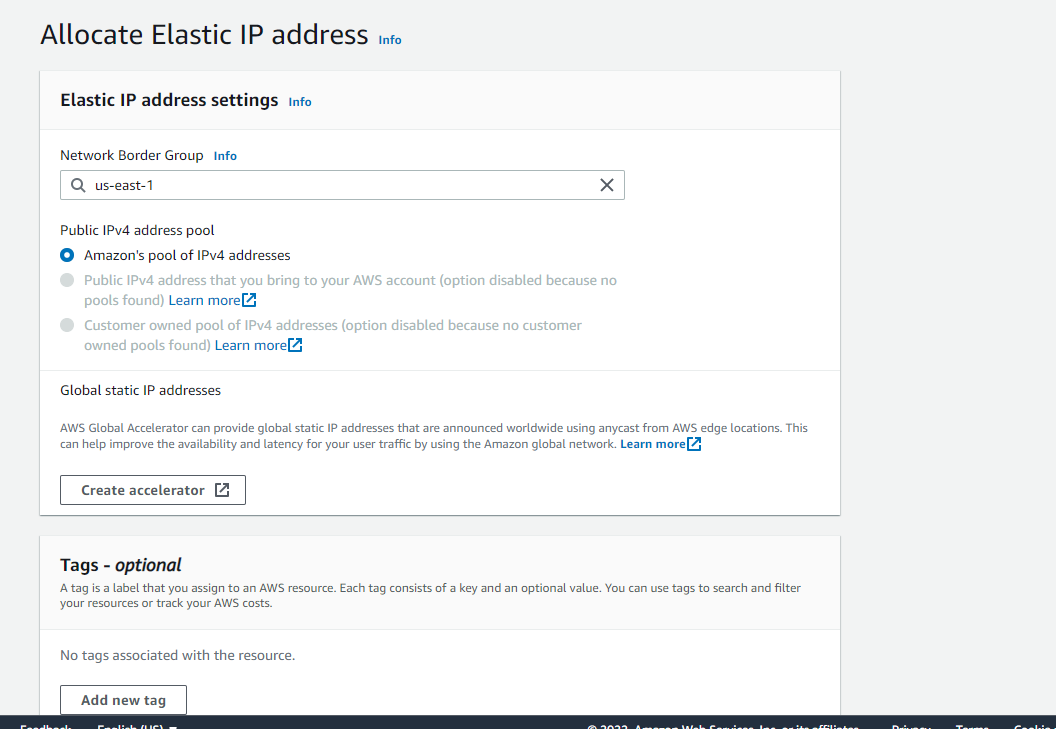
I set the network border group to US-East -1, so that’s how I set it. Create an IP address after setting it to the network border group that you set
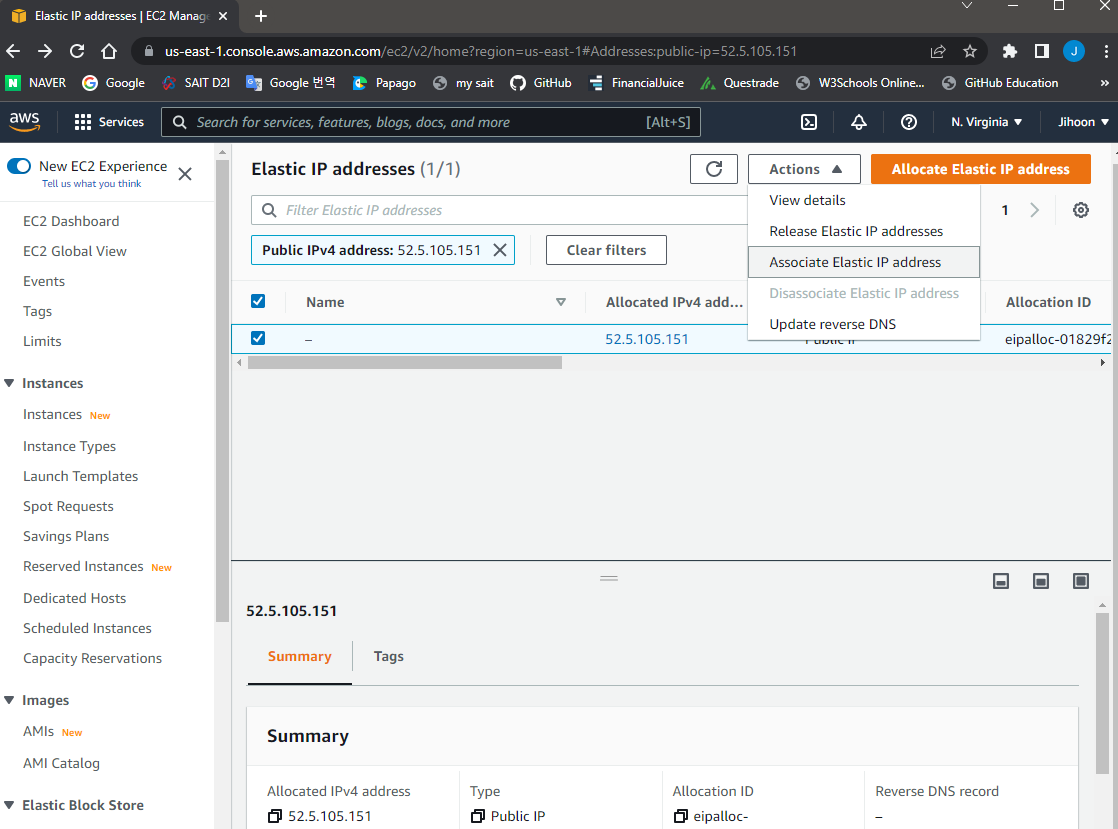
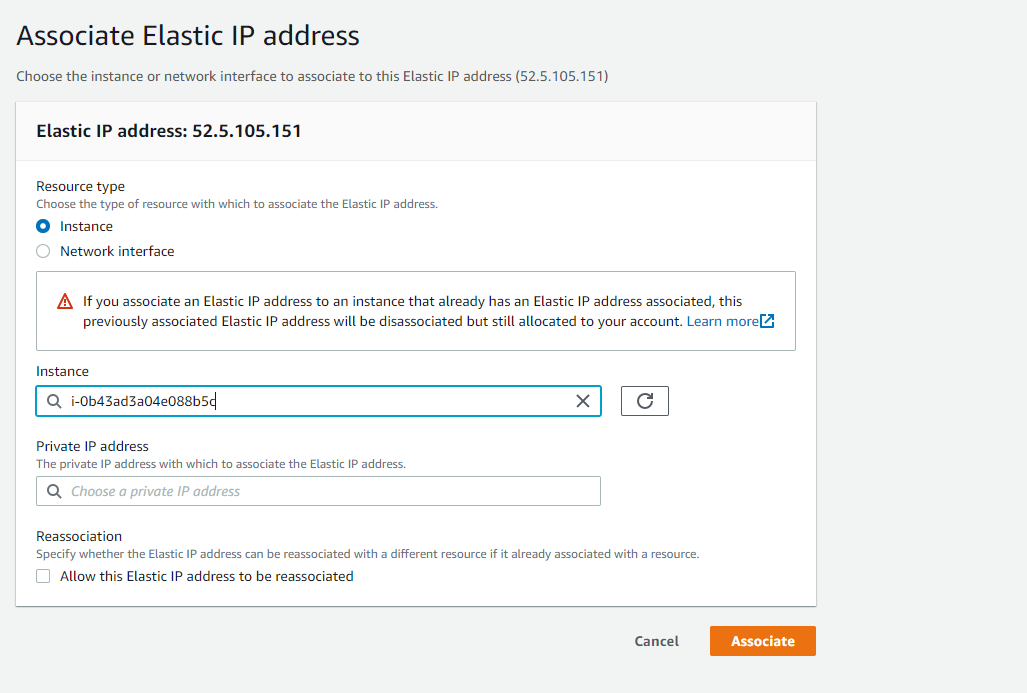
If IP is set, you can set the instance by clicking Associate Elastic ip address on the Action button. Set the appropriate instance
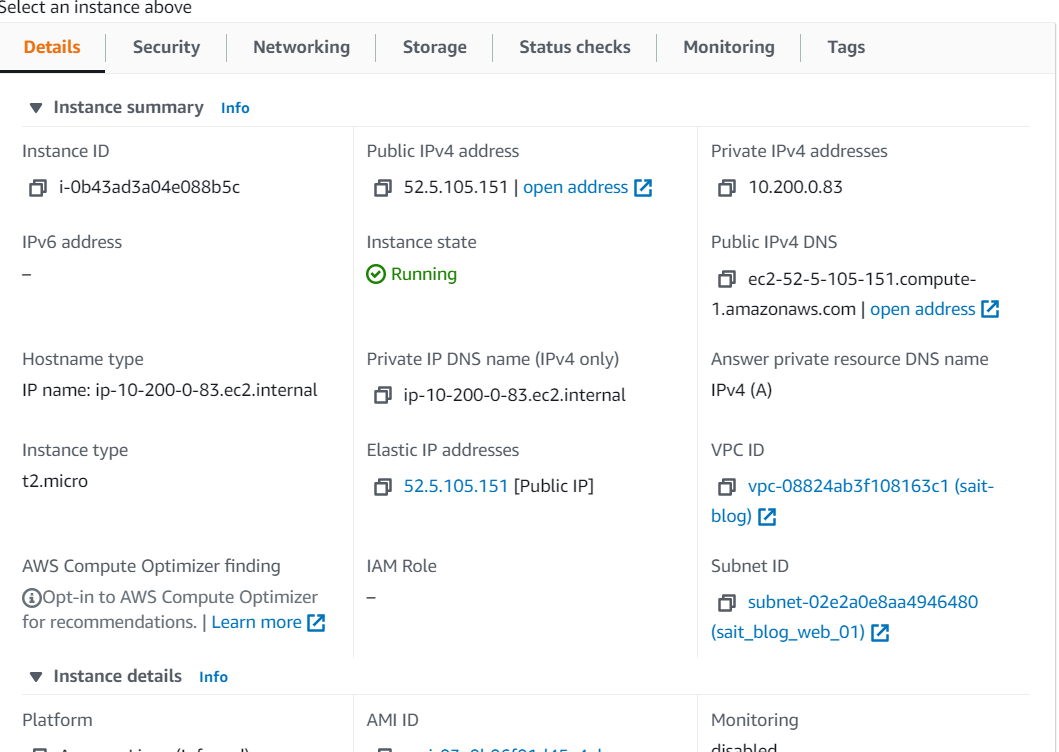
Finally, you can see that the public ipv5 address has changed. Now a website server has been created. You can access it by entering the ipv4 address or ipv4 DNS address on the homepage.
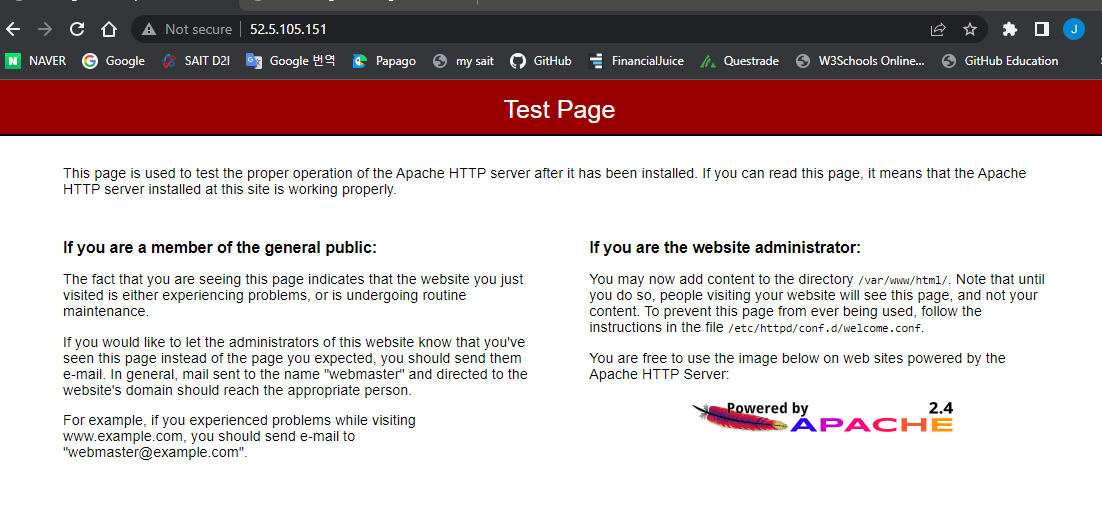
As you can see, if you succeed in the server, you can access the ip address you created. But I don’t know why, but I was able to access it about 30 minutes after all the completion. We will end the server setting and gate and subnet setting using aws.
Leave a comment